Contrast ratios are one of the defining characteristics that define the look of an image. Contrast ratio is expressed as the difference in the amount of light exposing different parts of the image.
So if we have 100% light on one side and 50% light on the other, the ratio would be 2:1. The light would be double on the bright side. Try it out here in this simulator in its most basic form.
The above is only a simulation, so now let's try and have a look at what that could look like on a real image.
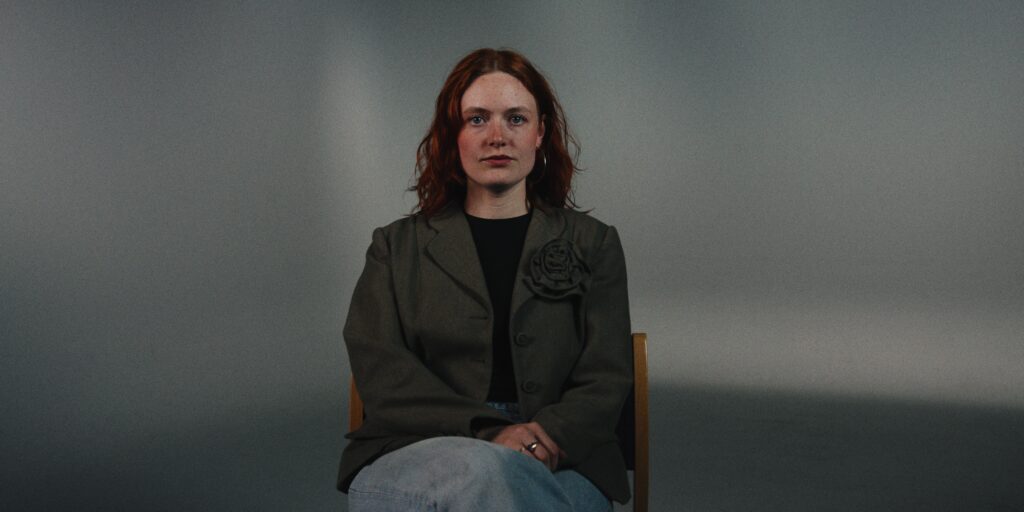
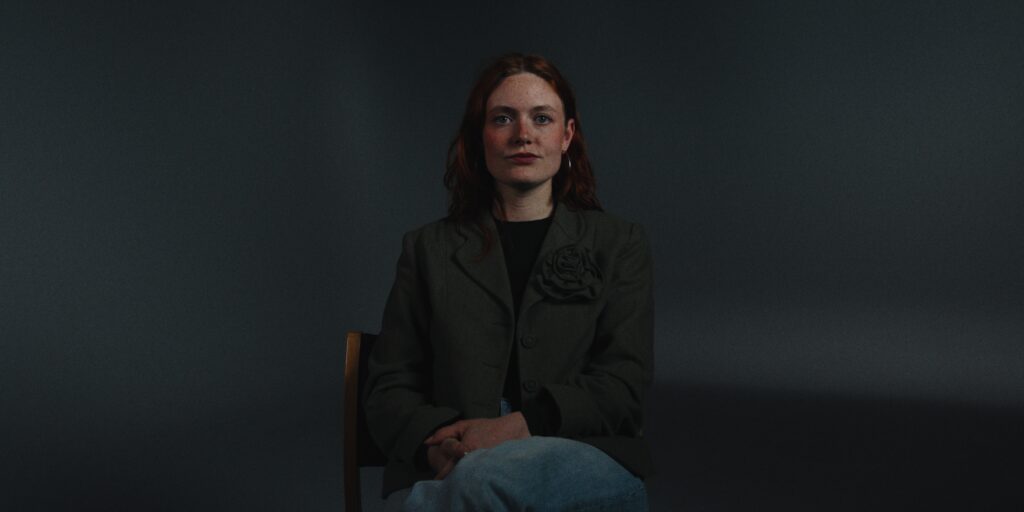
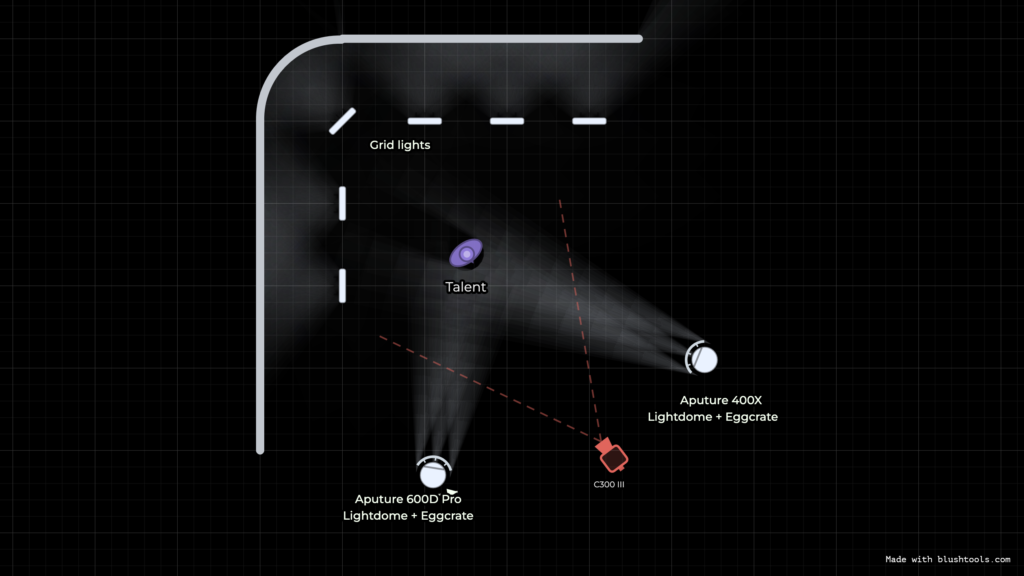
Contrast ratios are the only differences between these two images. Everything else is completely the same. Click below if you want to see a lighting diagram of the setup as well.
Lighting Diagram
As you can then imagine using contrast ratios is an incredibly powerful tool to control the look of an image. This means that if you know what contrast ratio you want for a given scene you can always target that. In the past this has been difficult without a light meter, but in recent years solutions like EL Zone has popped up which let’s the cinematographer check the ratios directly on their monitor, through the use of advanced false color based on the sensor interpretation of linear light as opposed to the usual IRE signal, which false color usually does.
Let's say you want your next shoot to have a dramatic look, so you want to emulate the contrast ratio of this image:
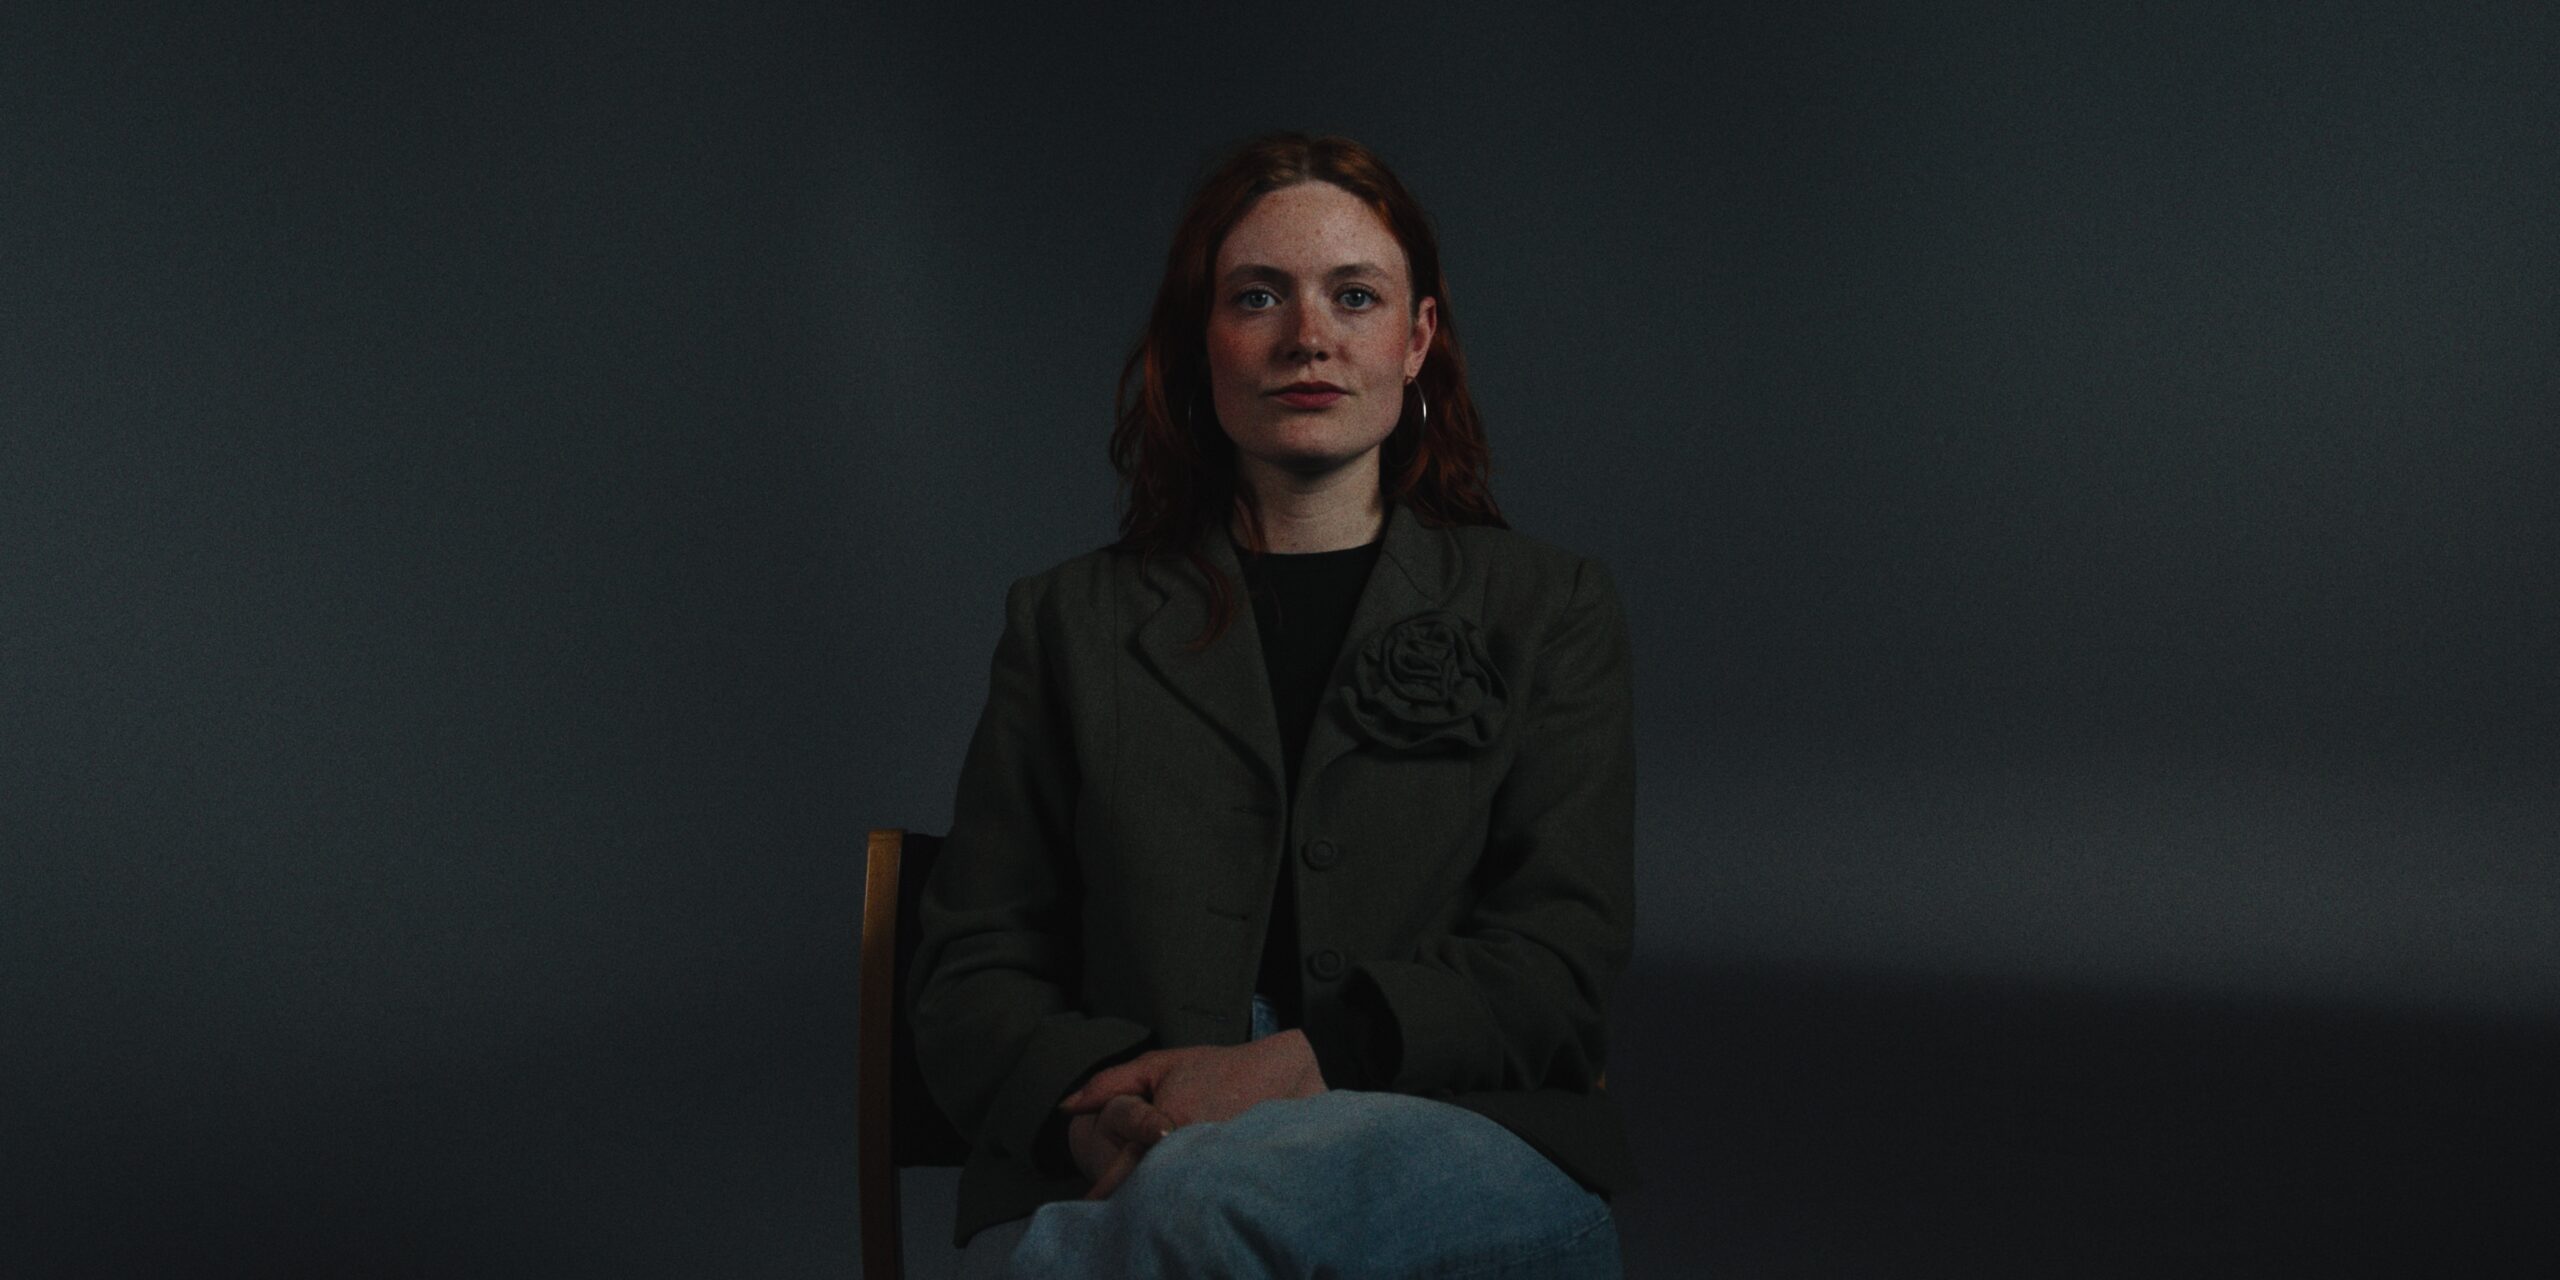
We can then highlight each stop of light in the image with false colors and thereby highlight the contrast ratios.
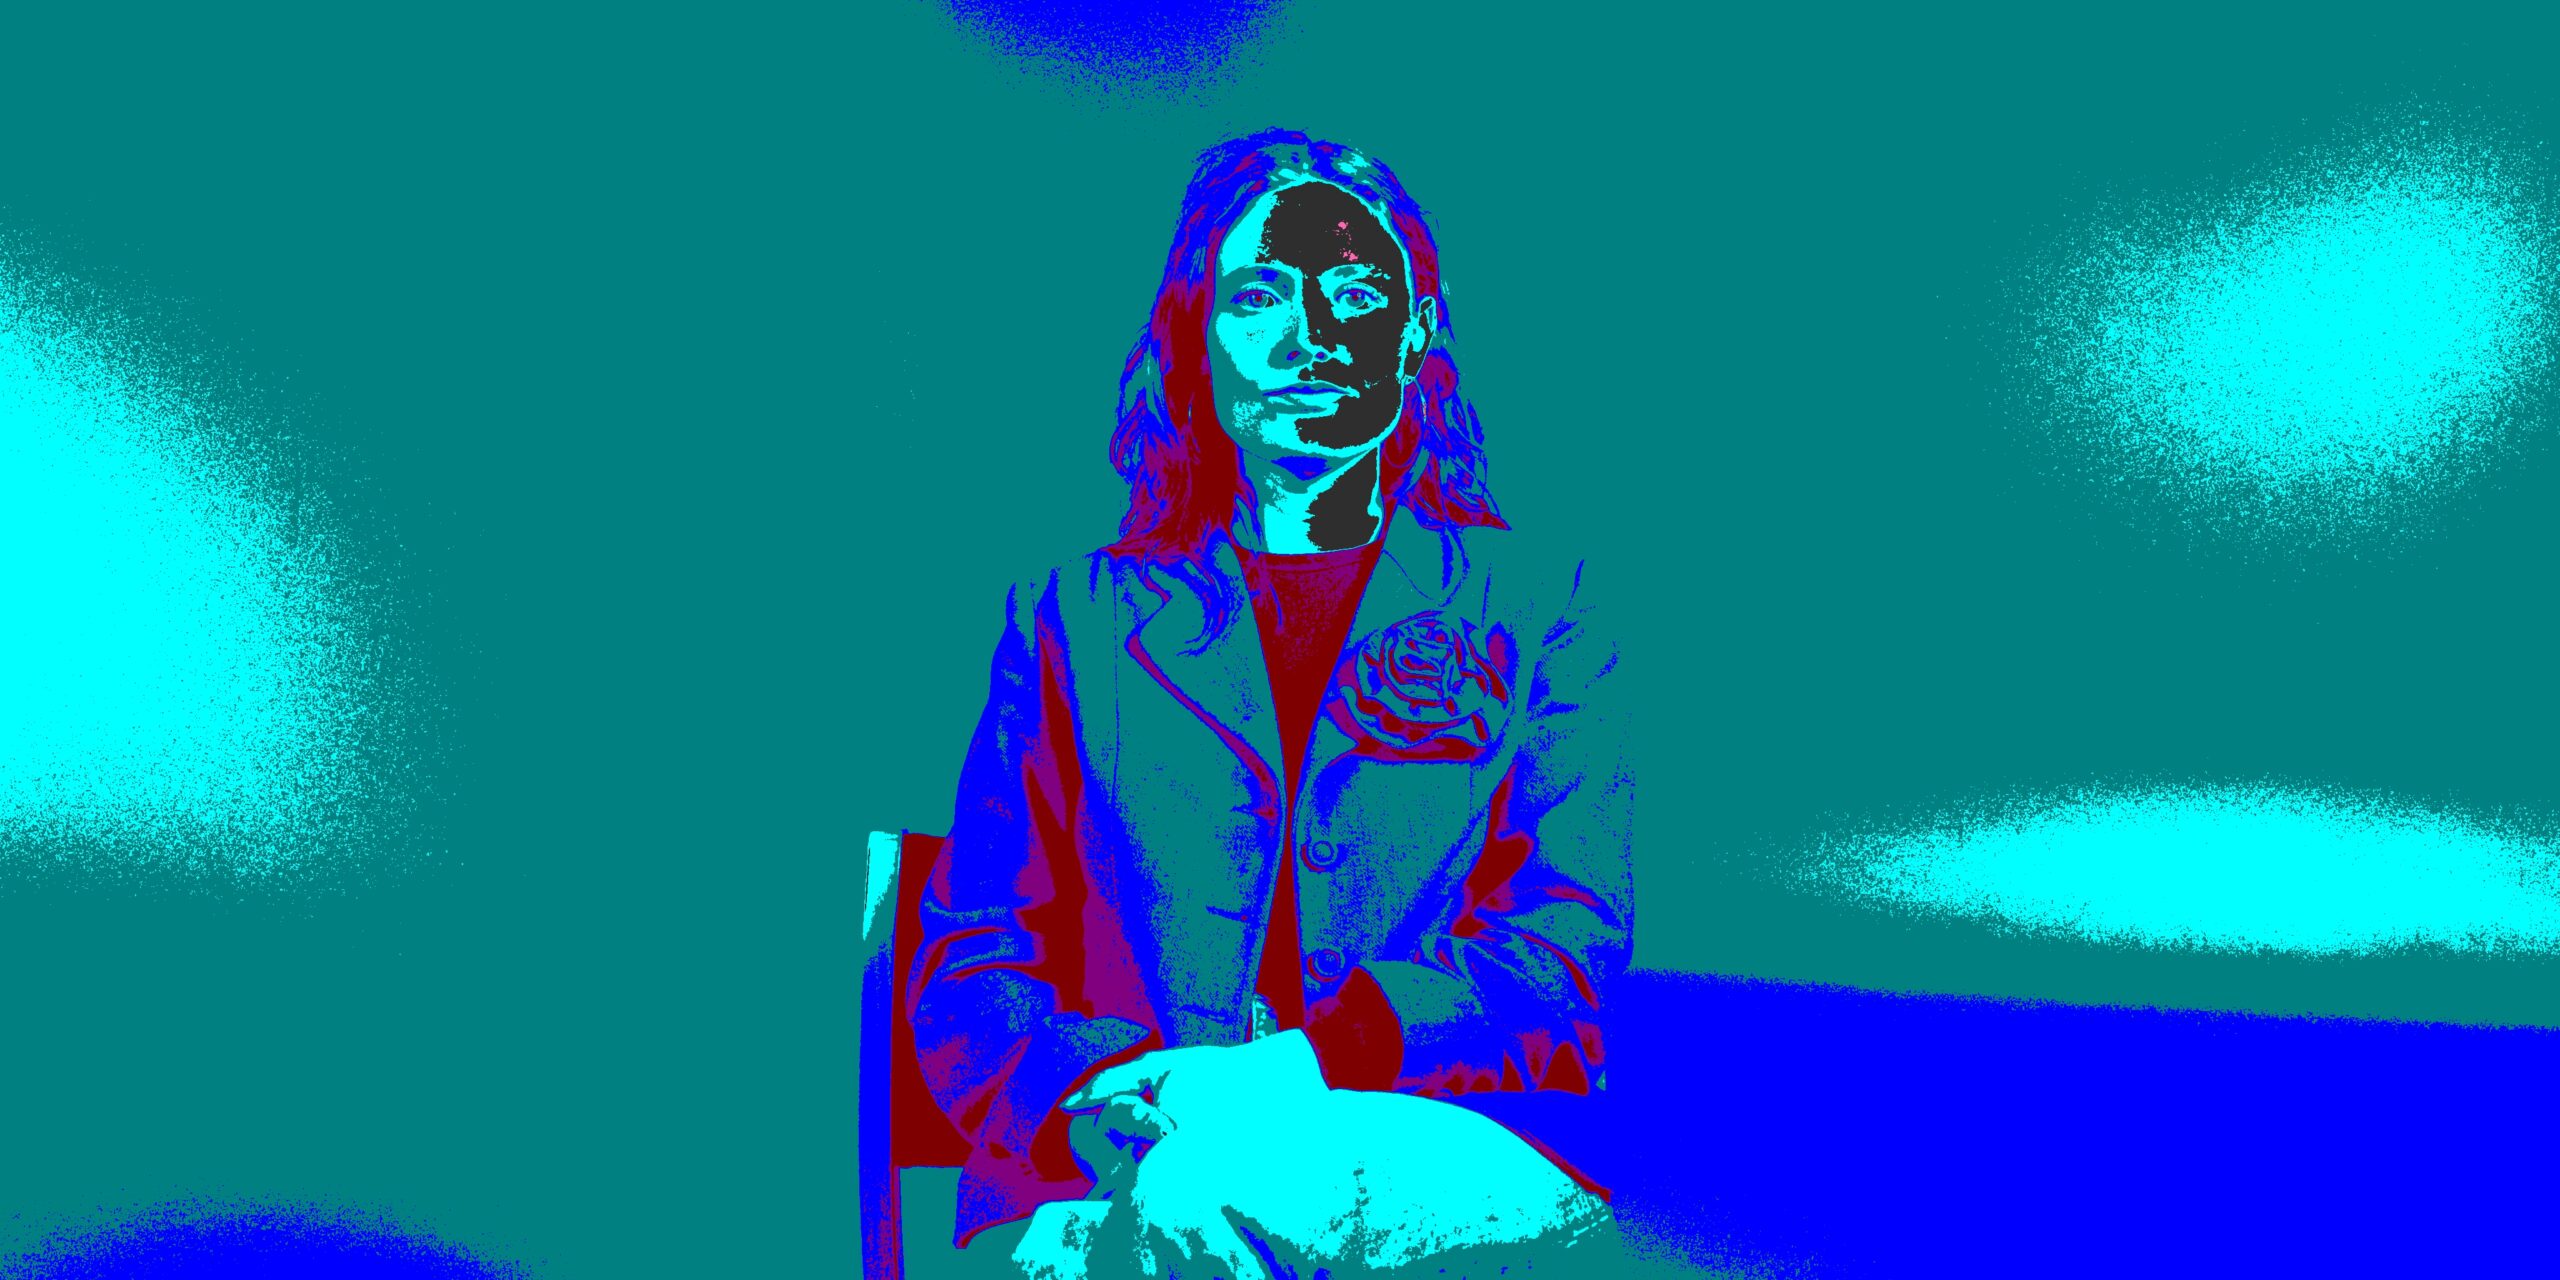

With this we can the see that the right side of the face (the grey color) is exposed at key and the left cheek (the teal color) is exposed two stops below. That means there is a 2 stop difference between key light and the fill side. That is a contrast ratio of 4:1 (meaning there is 4 times as much light on the key side compared to the fill side) since the light doubles for every stop.
But what does it mean to expose something "At key"?
Well for cameras to be able to create consistent exposures, the image needs an anchor everyone agrees on. That ended up being 18% grey which perceptually is halfway between black and white.
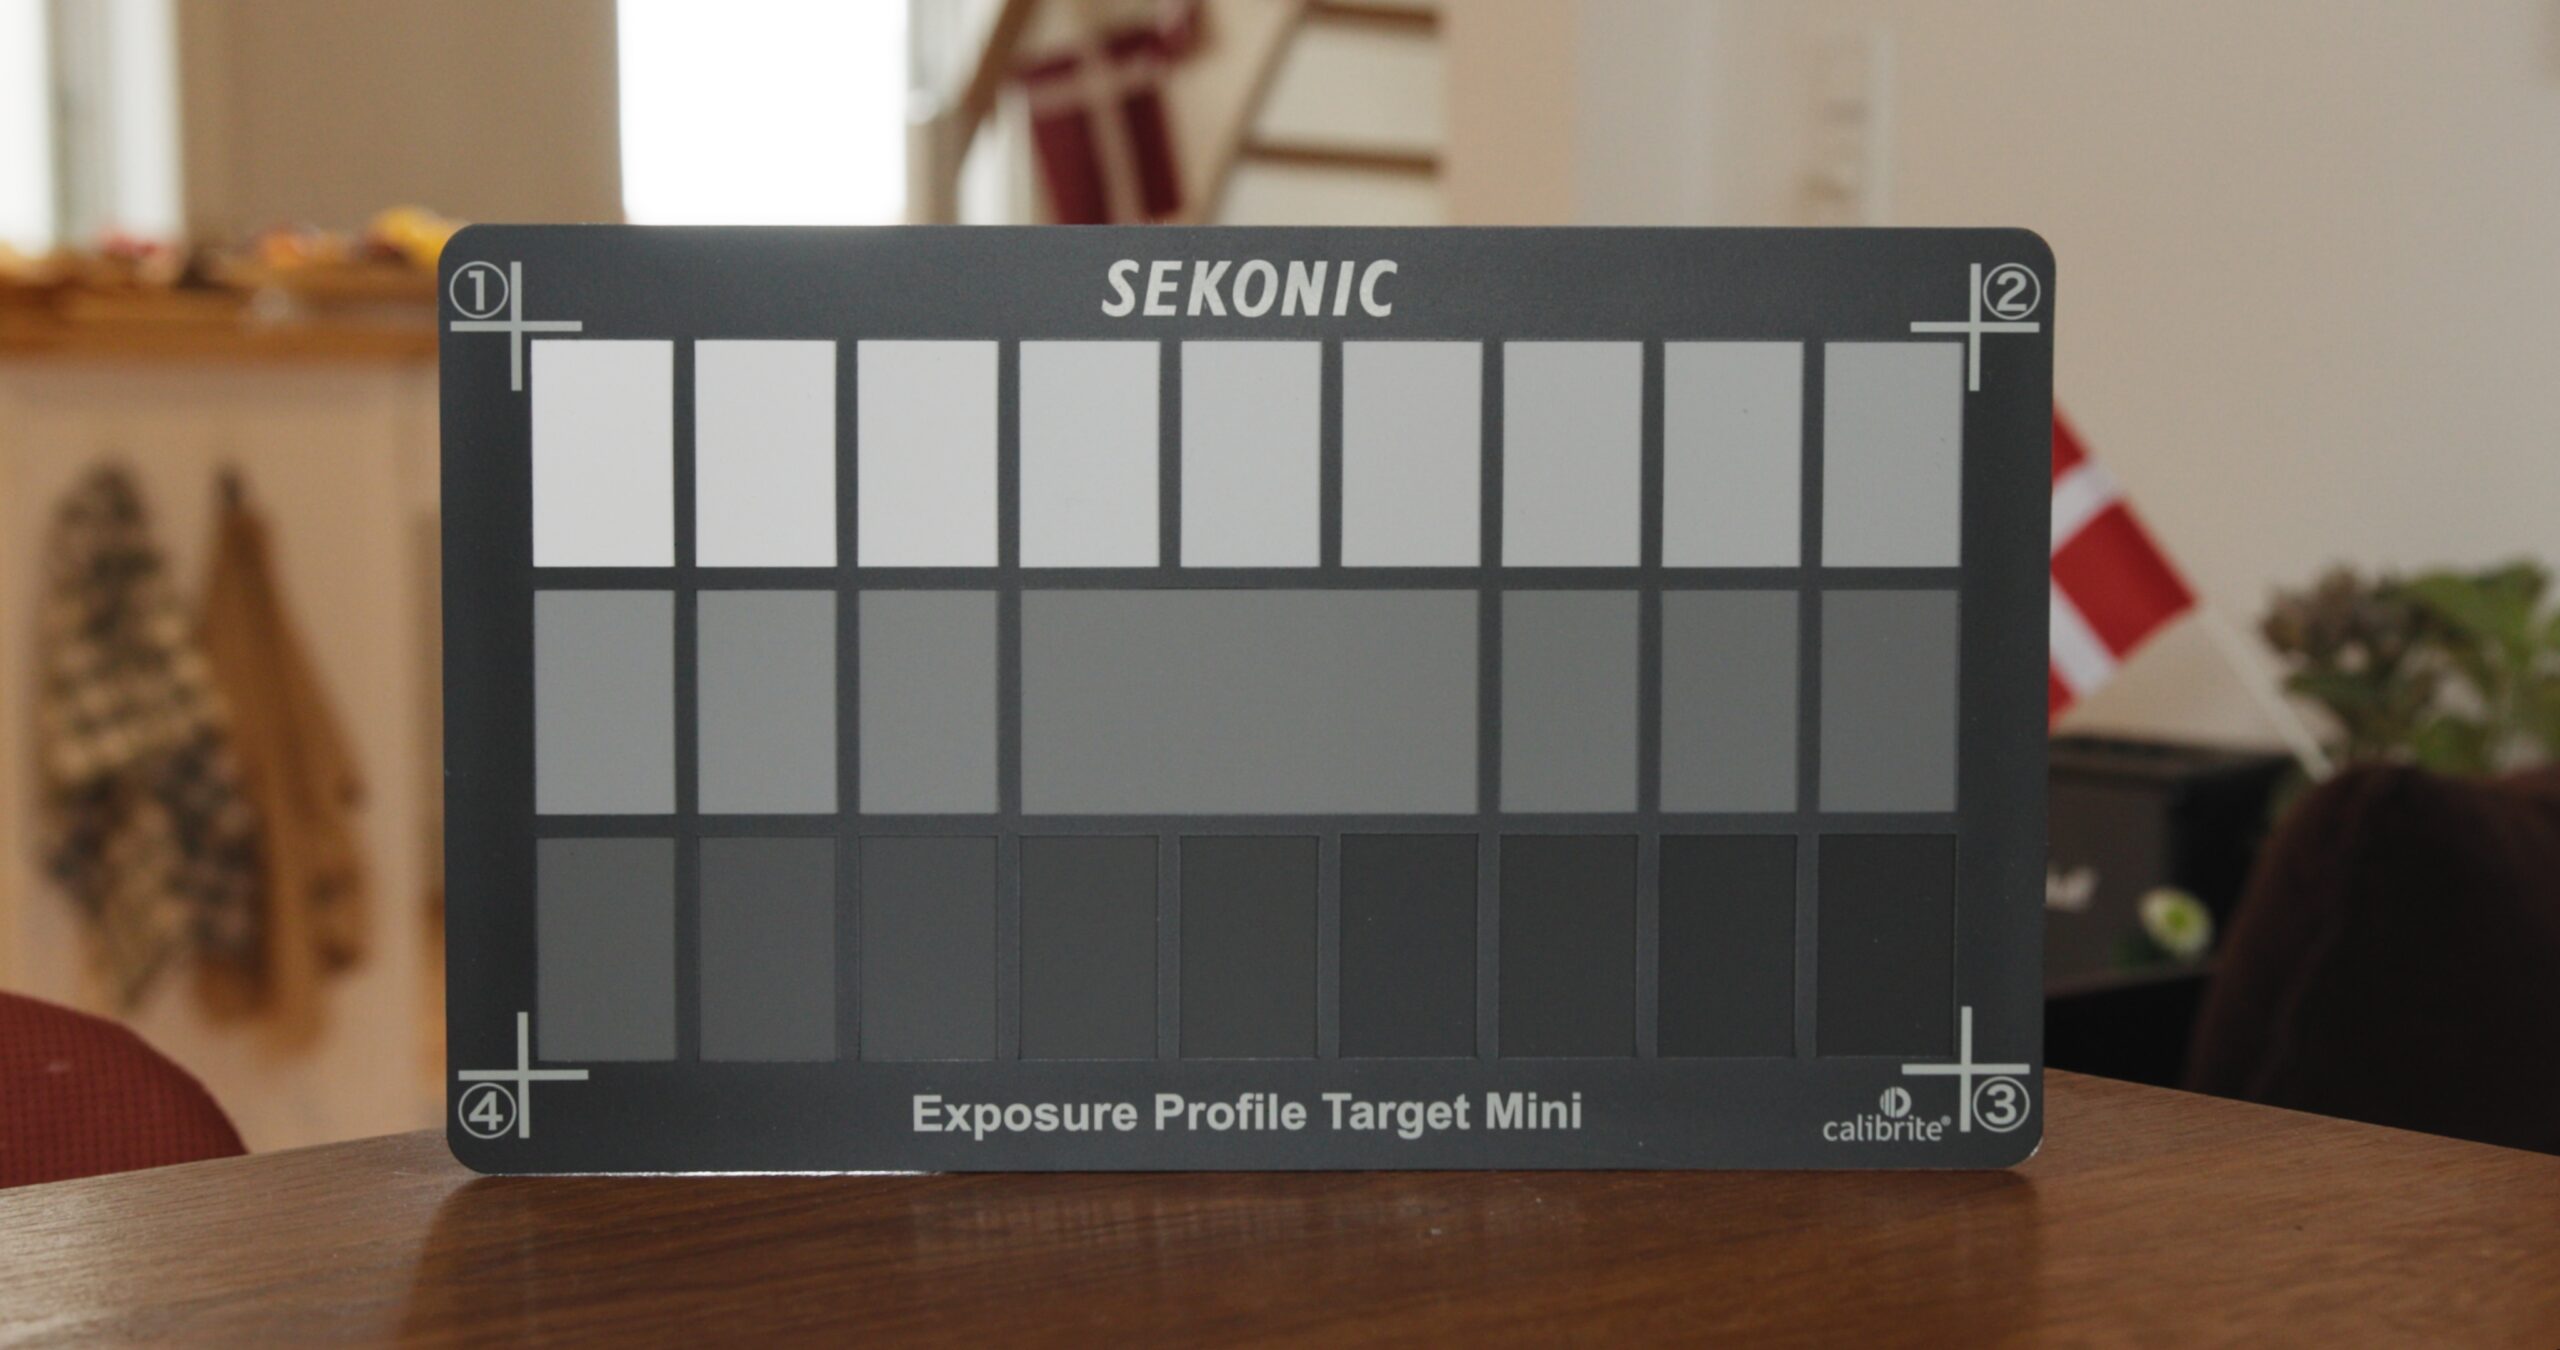
The gray patch directly in the middle of this chart is 18% grey. Exposing "at key" simply means exposing it so that this grey is at a very specific point that is specified by the camera manufacturer.
From there every time the light hitting the sensor halves or doubles there is a stop of light.
To measure the light we use aperture stops (f-stops). You may know the aperture range, and if not it is as follows.
1.0 -> 1.4 -> 2 -> 2.8 -> 4 -> 5.6 -> 8 -> 11 -> 16 -> 22 -> 32
(I would highly recommend learning it.)
A note on going up and down the aperture range
The aperture range can be very confusing since it is actually a fraction of the focal length. That is why its f/2.8 and not just 2.8. That means if you have a focal length of 35mm your f-stop is actually 35/2.8=12,5mm. So that aperture opening is 12,5mm in diameter.
If you are shooting at an aperture of f/2.8 and you want to go up you actually don't go to f/4, but instead to f/2 since that makes the aperture hole bigger. 35/2=17,5mm.
Every time we go up or down one stop on the aperture range the light halves or doubles and we call that “a stop of light”. We can then measure how much light is hitting a given area using a light meter. If we input our camera settings into a light meter and meter measures an f/4 then if we set our camera to an f/4 our 18% grey card will be measured at that exact point the camera expects 18% grey to be.
How to use this in practice
Knowing this gives us immense power! We can use false color tools to highlight the image with color while we shoot and dial in our lighting according to the look we want to create. If we have acces to it we can use EL zone that highlights each stop of light or we can create a LUT that highlights only the relevant ratios we care about.
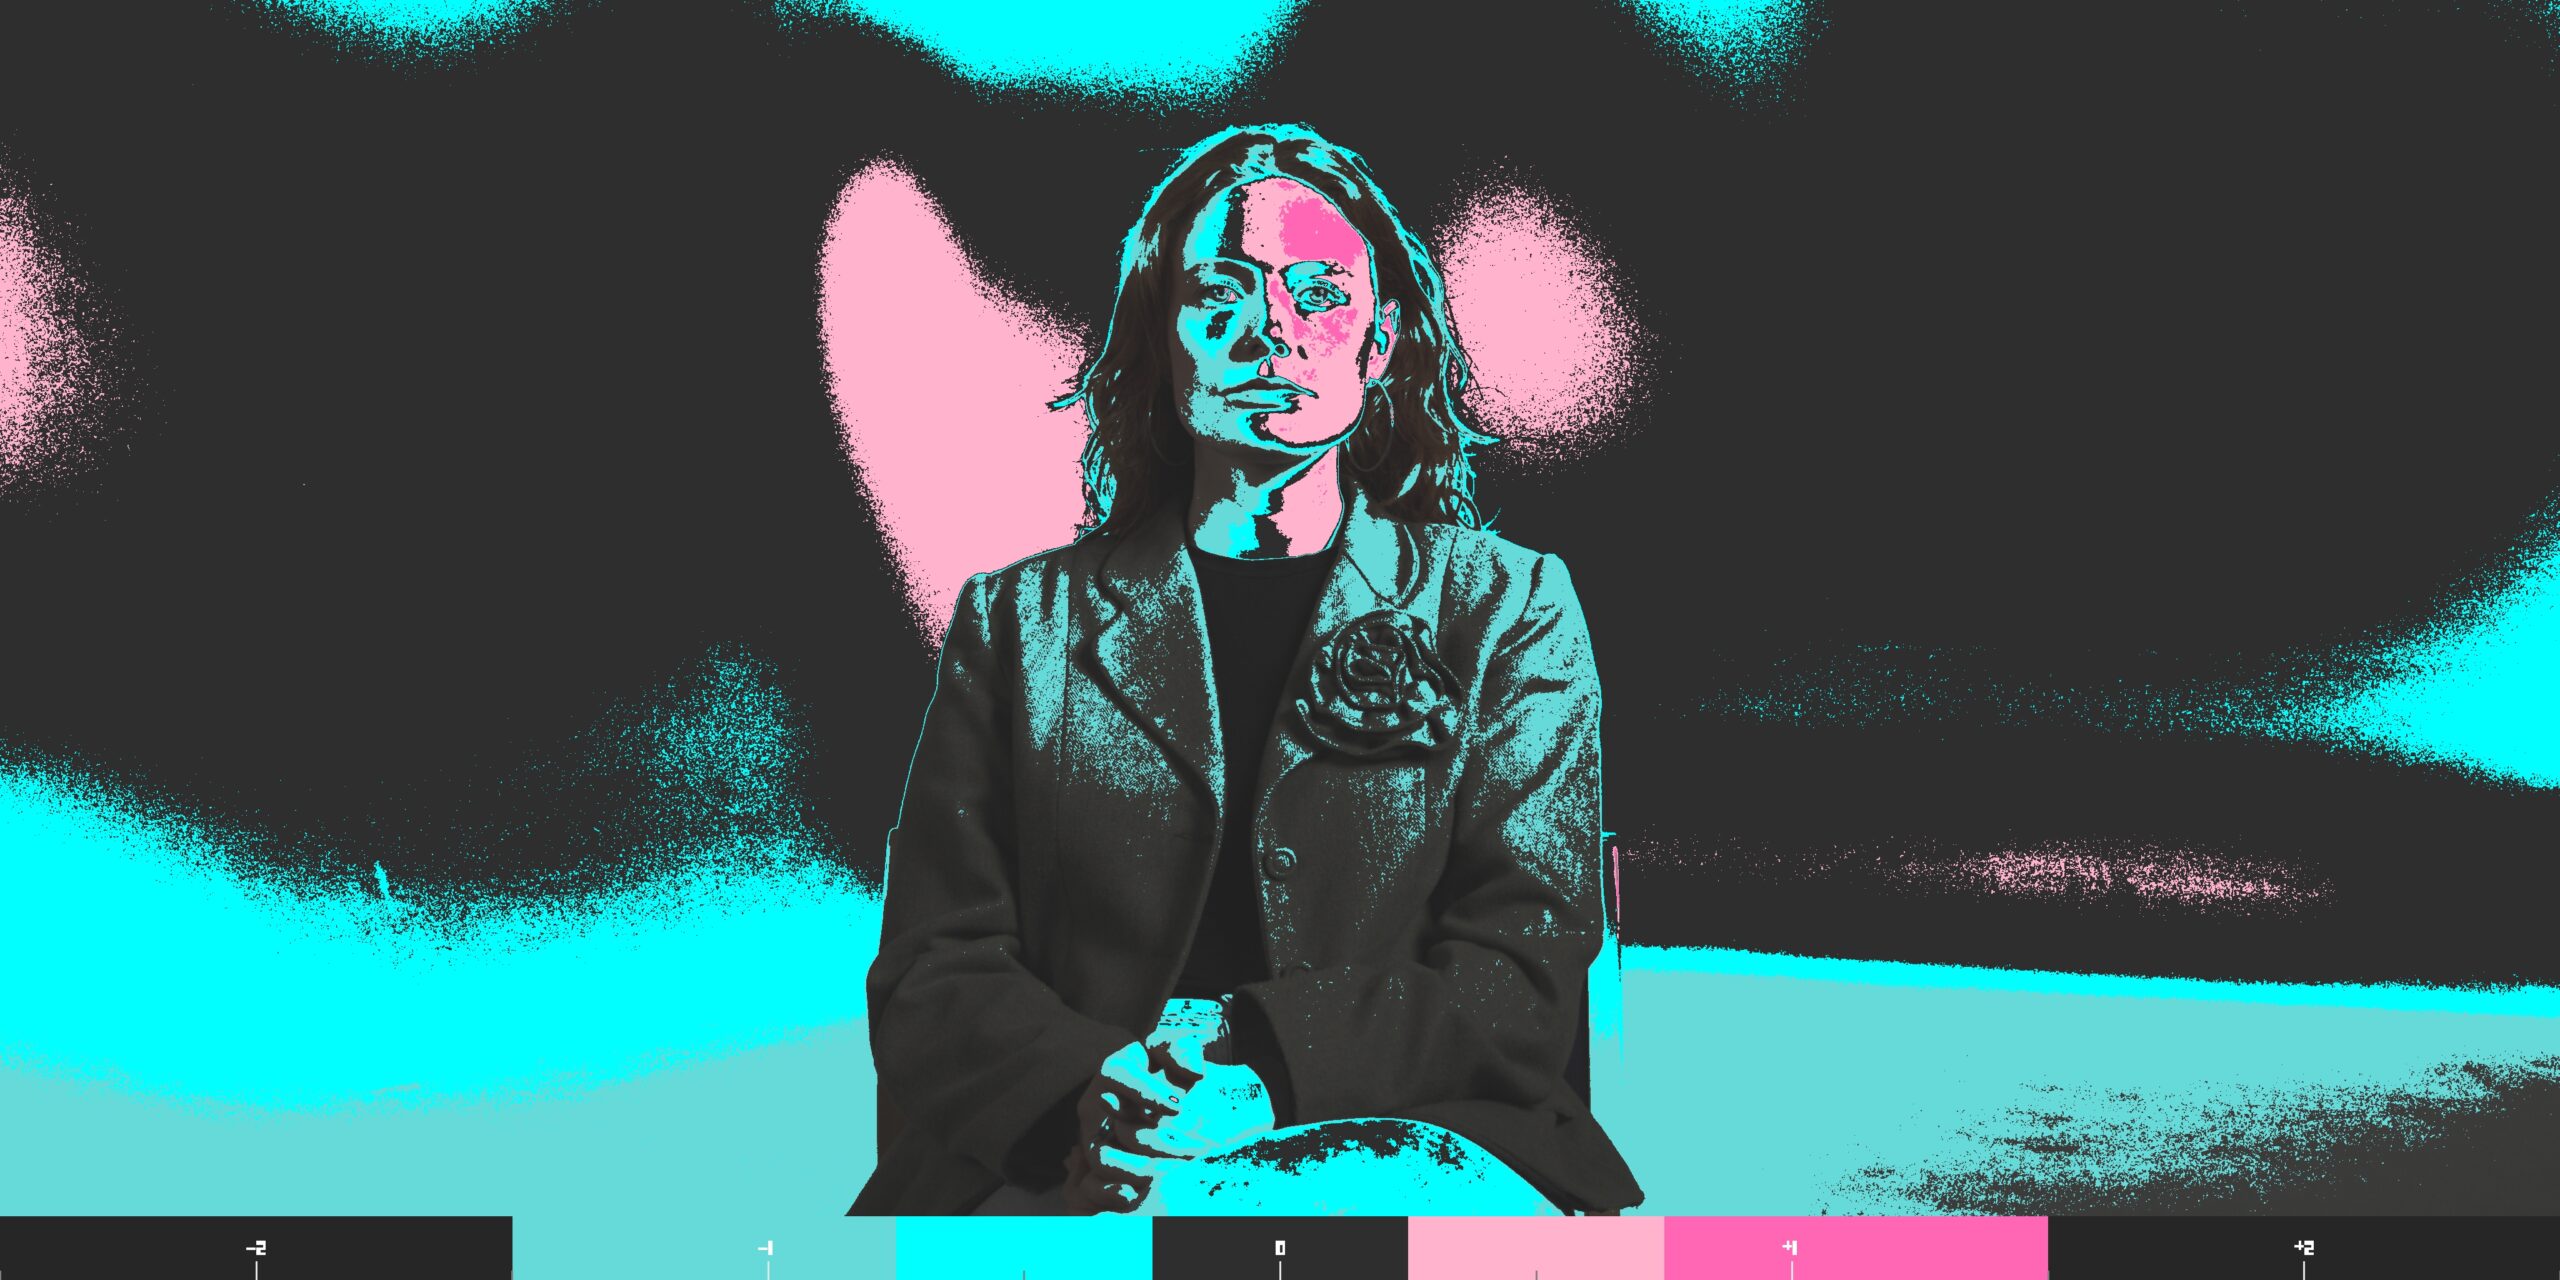
If you are interested in looking more at the exposure of your images you can download our DCTL that allows the user to create a custom false color and analyze the exposure of an image.
Go to our patreon to acces the tools and support Exposure Notes
Leave a Reply